Showing posts with label Makeup. Show all posts

Allo Allo

Greetings!
Firstly, thankyousomuch Jowee a.k.a the most awesome guest blogger ever!
You put us all to shame.

Anyways, here's one of my outfits that I wore ages ago.


This dress just inspires me to team it up with red. I wasn't feeling bold enough to wear it with my red tights so I wore it with a red scarf instead.


On another topic,
Meet Isabel Brodie, she turned 21 two days ago!
The point of this is to show off her make up. LOL.
I did most of the girls make up for our night out. I'm just self praising myself because this is my first attempt on applying make up on someone else. The birthday girl got special attention and I'm personally very proud of my masterpiece. Self praise. Didn't have much time to everything nicely as we were already running late. Youtube helped loads, will share with everyone the video I used.

That's all for today.
Tata!

Gold lids, red lips


Today let's talk make-up.
This post assumes you already know the basics of make-up.

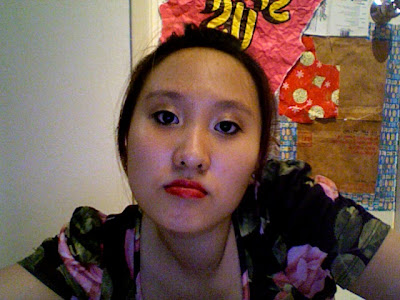
But first, as proof, here's what I look like without it.


Here's me with the look we're doing today.


Bangs swept away showing a high forehead. (Tyra calls it a fivehead) and those red lips I love.

As a side-note, I always hated my large forehead (and my eyes... and huge nose for that matter. Lol, no I'm not insecure.) Growing up, boys in particular gave me a hard time. They said I looked bald, and it always reminded me of aliens/martians/eggheads, also I think it makes my face look huge. That's why I always had bangs, even my hairdresser advocates bangs for me to cover my "huge forehead".

However, its regarded as "beautiful" in high fashion. So, taking a note from high-fashion in making the ugly beautiful, I try I try.


It's important that we all have well-shaped eyebrows, and a clean face to start with. Your face is your canvas, your paper, so before everything else, let it be moisturized, even-toned, and pimple-free. Facials are important and an integral part of grooming patterns, like getting your hair-cut.


For this look, I used:

1. The Body Shop brow definer
2. Kate "deep eyes" palette in shades of Bronze and Gold.
3. MAC powerpoint eyeliner (Crayon) in charcoal black
4.MAC zoom lash
5. Standard drugstore eyelash curler and the bodyshop eyelid brush
6. Stage lipstick 05 (Racy)

(I usually apply blushers and cheek tints, but I went without it because the goal today is one striking hue of red, and minimalist everything else. I also usually O-D on the eyeliner, but again, today I held it off.)

SO OKAY!
Let's get started!

After applying foundation, concealer (if necessary) and doing your brows...
hold up your palette, and use the light-gold section on the far right as the base.

Be sure to cover the entire lid, and additionally on the browbone. I also use it under my lids, and in the inner corner of my eyes. Basically the whole thing.
Next, use the bronze (the largest midsection portion) as a shading in the socket. All eyes have this socket, push your brush deep into the nook of your eye here. This creates depth or a "shadow".
In addition to the socket, I create a "V" at the ends of my eyes with the same Bronze shadowing. The "V" pulls the color together so that it does not look awkward (As if the shadowing is only at one part)

After that, we must highlight. So taking the silvery-gold portion of the palette (the smallest section), apply it in the middle of your lids, where you'd imagine your eyeballs to be, in that exact amount of an eyeball.
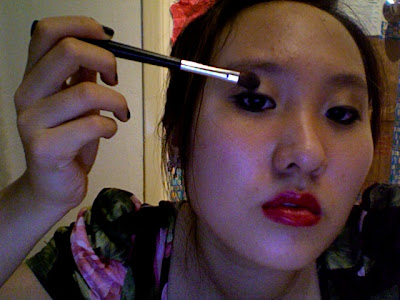
Then take the dark green and line your lids to the desired shape (as an eyeliner). And the dark brown for the under-eye.

I like to apply eyeliners under the eyelash because without, there seems to be a gap of un-applied liner between my lashes. So I do that. Its not scary trust me. You will not gouge out your eyes. Well, unless you're retarded.

Then curl your lashes, and apply mascara.

I like to curl my lashes at an angle, like so:
I do this because my lashes are a little retarded, I have to tilt the handle upwards after curling so that it curls more seamlessly and the curls don't look awkward. But, that's just my eyes.

Then my favourite part, slather on the red rouge!
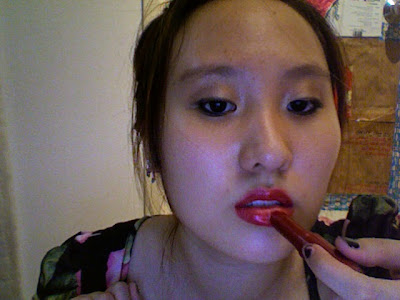
I give my lips a dap with tissue paper because the red is a little too red for me sometimes. I dab once over, then another time. (twice)

after that, I slather on a gloss. Any gloss of your choice.

And after that, YOU'RE DONE!


Here are camwhore shots of the end result.

Remember, this is what I used to look like.

Here's now:


End!
Thank you very much.


XOXO,
your favourite guestblogger.


p.s. I do not particularly like the first and last picture of my camwhore shots.

How To Do Swan's Crazy Eyeliner

As promised, (and since I have the most requests for this) here is a simple tutorial on how to do my makeup. It really is quite easy and once you've mastered it, it takes about 5 minutes to paint it on. Fuss free indeed!


PS: And if you have single eyelids and have no idea how to put makeup on, this should be pretty useful. It really helped me a lot since we single eyelid-ers can't put on makeup the way double eyelid people do. =.=


Anyway, before applying any form of makeup, you HAVE to cleanse, tone, moisturise. Basic skincare routine is very important to prevent premature aging!


After I cleanse, tone and moisuturise, I apply a makeup base from Shu Uemura to smoothen the imperfections on my face as well as lessen to lessen the redness. The makeup base also acts as a barrier, protecting my face from the powder foundation which will be put on after all the eye makeup is done.


It also has SPF if I'm not mistaken, so I don't have to put on sunblock. =)

You have to hold the bottle at 90 degrees and shake well before squirting it out. The texture is kinda foamy and light. Just apply it evenly over your face and you're good to go.


Jowee once asked me what was the one makeup product I don't leave the house without. And my answer was the Shu Uemura makeup base. It has become ingrained as part of my skin care routine I supposed.

I used to use a MAC makeup base which was not bad too but was slightly oilier. =/


Okay, here is how I look sans makeup on except for the makeup base.


So the first step to replicating my eye makeup would be the ever important liquid eyeliner.
As you can see, I use MAC's LiquidLast Liner which I find really good as it firmly stays on without smudging until you take it off.
In other words, it really does last.


Okay, so you draw the liquid liner close to your lash line extending outwards and upwards with a tiny little flick upwards at the end. You liquid liner should be JUST visible when you open your eyes (like the picture above).
Since everybody's eyes are different, use your own discretion when applying please.
(Oh and ignore my bad skin. stupid macro mode is too good liao. =.=)

This is the actual amount of eyeliner I had to put to fill up the space from my lashline to the top where it is JUST visible when I open my eyes. And you can see the cat-eye-upwards-flick more clearly here.
Hohoho, scary isn't it?
Oh yeah, a common concern about using liquid liner is that you have to have super steady hands. That is REALLY untrue. Because I have super shaky hands (I can never play Operation! >.<).
The trick is to rest your hand on your chin or on the mirror while using the liquid liner.
Now you know! ;)

Here you go. A comparision of before and after the liquid liner.
Obviously my left eye is after and my right eye is before.
The liquid liner is sort of like the base, once you hae that in place, you can use any kind of eyeliner on top of it in any colour to blend.
It basically gives your eyes more definition. ;)

Both eyes with eyeliner. Doesn't it look slightly bigger already? ^_^


After the liquidliner, you can use any sort of pencil or liquid liners in any colour you want for the top part. I usually use pencil liners coz they don't look so harsh.
Here I'm using MAC's pencil liner in Prunella. It's a mixture of brown and purple.
At other times, I use Silkygirl pencil eyeliners. At only RM14.90 they're really affordable plus they stay on forever. The only downside is that you have exert a bit more force when you draw it on which isn't good for the eyes (all that excessive pulling =S) as it will cause wrinkles around the eyes sooner or later.
This is why MAC eyeliners rock coz the colour glides on really easily and it's supremely easy to blend. However, MAC's pencil liners don't stay on AS long and tend to smudge a little towards the end of the day and they are like thrice the price of Silkygirl's eyeliners.
But if you want quality, you have to pay a price for it I guess.
Using the liner and colour of your choice, just draw on top of the liquid liner following its shape, overlapping it just a little bit so that the two colours blend.
Remember to extend that wing at the end of your eye so that it looks bigger!
And as you can see, that's before and after again. Such dramatic differences. Le sigh.

A closeup of my eye after the pencil eyeliner.
You can actually alter the shape of your eye when you draw the pencil eyeliner on depending on how you want your eye shape to me.
In my case, I want my eyes to look bigger so the middle part of my eye is extended higher so that it looks bigger.
But if you want longer eyes, you should extend the eyeliner to the back more, giving the illusion of longer, sleeker eyes.

When I close my eyes, this is how it looks.
Ideally, you should blend until you cannot see the distiction between the black liquid liner and the Prunella pencil liner.

To aid the blending process, you can employ the use of a black pencil eyeliner but you run the risk of getting smudges after a while. What I usually do is just draw on the line between the liquid liner and the pencil liner till the two distinct lines aren't visible anymore. For some reason, coloured pencil liners don't smudge as easily as black ones do. 0_o

Just repeat the process for the other eye and you're good to go!
This is how it looks like when you close both your eyes.
Lastly, just line your lower lashline with the pencil eyeliner.
I usually just line it halfway. Going all the way in is a bit too scary and animalistic!

There we go! The finished product!
Since my right eye is slightly smaller than my left, I have to draw more pencil liner to even it out and make it look roughly the same size.

Here are just some other photos using other coloured pencil liners:

Photobucket
Minty Green from MAC as well.
(Please ignore ugly face, it was the end of a very long day.)

Photobucket
Aaaand...my trademark purple which is from Silkygirl.
If you want to add more sparkle in the form of eyeshadow, add it above the pencil liner, blending it all the way to your browbone. I only do that for special occasions or during the night coz the eyeliner alone look very heavy already.
Alternatively, you can also put white/silver eyeshadow or eyeliner on the inner corners of your eyes to make your eyes look even bigger. Personally, I used a silver liner from some Japanese brand to do it. Again, I only do it for special occasions or for nights out coz it's a bit scary to have so much makeup on normally. =P
So there you have it! How to make your single eyelid eyes look bigger in a super simple way.
If you plan on trying this out, tell me how it turned out! It gets better with practice I assure you.
=D